1 Introducción al tutorial de MS Access 2010, 2013, 2016 y 2019
Bienvenido al tutorial de MS Access. Este tutorial está diseñado para que el usuario pueda comenzar a usar MS Access (en adelante, simplemente "Acceso") de manera rápida. Se muestran los cuatro módulos básicos de Access:Tablas, Formularios, Informes y Consultas. En primer lugar, se analiza un ejemplo empresarial que proporciona una base para desarrollar una base de datos sencilla.
Se supone que los usuarios de este tutorial dominan el trabajo con Microsoft Windows XP/Vista/Win7/Win10, etc. y con MS Excel. Esto incluye el uso del teclado y el ratón. El tutorial se basa en Microsoft Access, que forma parte de la suite Microsoft Office Professional que también incluye MS Excel, MS Word y MS Powerpoint.
Este tutorial cubre MS Access 2007, 2010, 2013, 2016 y 2019, que tienen una interfaz común (la "barra de cinta" en la parte superior) que es diferente de las versiones anteriores. Si está interesado en trabajar con MS Access ’97 o 2000, visite la página web Tutorial de Microsoft Access:información sobre MS Access ’97 y 2000.
El tutorial comienza con una breve descripción general de Bases de datos relacionales . La mayoría de los sistemas de gestión de bases de datos que se utilizan en la actualidad se basan en lo que se denomina el modelo de base de datos relacional. Access es un sistema de gestión de bases de datos relacionales. Luego describimos un ejemplo de negocio y damos un esquema de la base de datos y las aplicaciones que deseamos desarrollar. En las secciones que siguen, damos instrucciones paso a paso para crear tablas, formularios de ingreso de datos, informes y consultas para la aplicación.
1.1 Público objetivo
Este tutorial está destinado a estudiantes que recién comienzan con el sistema de administración de bases de datos MS Access.
1.2 Conocimientos previos necesarios
Este tutorial asume que el estudiante está familiarizado con la operación básica de una computadora personal y Windows 2000, Windows XP, Windows Vista o Windows 7. Las habilidades específicas requeridas para este tutorial son:
- Uso del ratón y el teclado
- Abrir y guardar archivos en el disco duro y en una memoria USB (memoria USB), por ejemplo
- Administración de archivos en general, incluida la diferencia entre letras de unidad, disco duro, etc.
- Ejecución de programas desde el menú Inicio de Windows
- Minimizar, maximizar y cambiar el tamaño de las ventanas
El estudiante debe tener una memoria USB (memoria USB) u otro dispositivo de memoria portátil disponible para almacenar los archivos que se crearán durante este tutorial.
1.3 Ejecutar Microsoft Access en un Apple Mac
Un problema que pueden enfrentar algunos estudiantes es el hecho de que MS Access solo se ejecuta en el sistema operativo Windows (como Windows XP, Vista o Windows 7). Si tiene una MacBook, iMac u otro sistema Apple que ejecuta MacOS que usa una CPU Intel, hay algunas alternativas posibles que puede probar. Muchas computadoras Apple modernas que usan CPU Intel pueden ejecutar el sistema operativo Windows. Tenga en cuenta que necesitará una copia con licencia legal del sistema operativo Windows para hacer esto. Hay dos formas principales de lograr esto:
- Puedes configurar tu Mac para "arranque dual" tanto en MacOS X como en Windows. Un producto que puede habilitar esto es el software Apple BootCamp.
- Puede ejecutar Windows OS "en paralelo" con Mac OS X usando una computadora "virtual" como VirtualBox
Índice
- 1 Introducción al tutorial de MS Access
- 1.1 Público objetivo
- 1.2 Conocimientos previos necesarios
- 1.3 Ejecución de Microsoft Access en un Apple Mac
- 2 Breve descripción general de las bases de datos relacionales y las aplicaciones de bases de datos
- 3 Un ejemplo de negocio
- 4 Iniciar Microsoft Access
- 4.1 Revisión del inicio de Microsoft Access
- 5 Creación y visualización de tablas
- 5.1 Crear una tabla usando la vista de diseño
- 5.2 Ejercicio:creación de una tabla
- 5.3 Visualización y adición de datos a una tabla
- 5.4 Ejercicio:Adición de datos a una tabla
- 5.5 Creación de relaciones entre tablas
- 5.6 Revisión de la creación y visualización de tablas
- 6 Crear y ejecutar consultas
- 6.1 Consultas de tabla única
- 6.2 Ejercicio:consultas de tabla única
- 6.3 Consultas de varias tablas
- 6.4 Ejercicio:consultas de varias tablas
- 6.5 Revisión de la creación y ejecución de consultas
- 7 Creación y ejecución de formularios de entrada de datos
- 7.1 Creación de un formulario de tabla única con el asistente
- 7.2 Ejercicio:creación de un formulario de tabla única
- 7.3 Revisión de la creación y ejecución de un formulario de entrada de datos
- 8 Creación y ejecución de informes
- 8.1 Creación de un informe de tabla única con el asistente
- 8.2 Ejercicio:creación de un informe de tabla única
- 8.3 Revisión de la creación y ejecución de un informe
- 9 Crear y ejecutar un formulario maestro/detalle (formulario con un subformulario)
- 10 Crear y ejecutar un panel de control
- 11 Crear y ejecutar un formulario de navegación
- 11.1 Ejercicio:Modificación de un formulario de navegación
- 11.2 Configuración del formulario de navegación como predeterminado
- 12 Resumen del tutorial y temas avanzados
La página siguiente ofrece una breve introducción a las bases de datos relacionales.
2 Breve descripción general de las bases de datos relacionales y las aplicaciones de bases de datos
Las primeras bases de datos implementadas durante las décadas de 1960 y 1970 se basaban en archivos de datos planos o en modelos de datos jerárquicos o en red. Estos métodos de almacenamiento de datos eran relativamente inflexibles debido a su estructura rígida y su gran dependencia de los programas de aplicaciones para realizar incluso el procesamiento más rutinario.
A fines de la década de 1970, el modelo de base de datos relacional que se originó en la comunidad de investigación académica estuvo disponible en implementaciones comerciales como IBM DB2 y Oracle. El modelo de datos relacionales especifica los datos almacenados en relaciones que tienen algunas relaciones entre ellos (de ahí el nombre relacional ).
En bases de datos relacionales como Sybase, MySQL, Oracle, IBM DB2, MS SQL Server y MS Access, los datos se almacenan en tablas formado por una o más columnas (Access llama a una columna un campo ). Los datos almacenados en cada columna deben ser de un solo tipo de datos como carácter (a veces llamado "cadena"), número o fecha. Una colección de valores de cada columna de una tabla se denomina registro o una fila en la tabla.
Diferentes tablas pueden tener la misma columna en común. Esta función se utiliza para especificar explícitamente una relación entre dos tablas. Los valores que aparecen en la columna A de una tabla se comparten con otra tabla.
A continuación se muestran dos ejemplos de tablas en una base de datos relacional para un banco local:
Tabla de clientes
| ID de cliente | Nombre | Apellido | Dirección de la calle | Ciudad | Estado | Código postal |
|---|---|---|---|---|---|---|
| Número | Personaje | Personaje | Personaje | Personaje | Personaje | Personaje |
| 1001 | José | Smith | 123 Lexington | Smithville | KY | 91232 |
| 1002 | Alberta | Jones | Avenida Davis 12 | Smithville | KY | 91232 |
| 1003 | Natanael | Hacha | 443 Molinillo Ln. | Broadville | GA | 81992 |
| 1004 | Paulina | Constructor | 661 Parker Rd. | Streetville | GA | 81990 |
Cuadro de cuentas
| ID de cliente | Número de cuenta | Tipo de cuenta | Fecha de apertura | Saldo |
|---|---|---|---|---|
| Número | Número | Personaje | Fecha | Número |
| 1001 | 9987 | Comprobando | 12/10/1989 | 4000,00 |
| 1001 | 9980 | Ahorros | 12/10/1989 | 2000,00 |
| 1002 | 8811 | Ahorros | 05/01/1992 | 1000,00 |
| 1003 | 4422 | Comprobando | 01/12/1994 | 6000,00 |
| 1003 | 4433 | Ahorros | 01/12/1994 | 9000.00 |
| 1004 | 3322 | Ahorros | 22/08/1994 | 500,00 |
| 1004 | 1122 | Comprobando | 13/11/1988 | 800,00 |
La tabla Cliente tiene 7 columnas (ID de cliente, Nombre, Apellido, Dirección, Ciudad, Estado y Código postal) y 4 filas (o registros) de datos. La tabla Cuentas tiene 5 columnas (ID de cliente, Número de cuenta, Tipo de cuenta, Fecha de apertura y Saldo) con 7 filas de datos.
Cada una de las columnas se ajusta a uno de los tres tipos de datos básicos :Carácter, Número o Fecha. El tipo de datos de una columna indica el tipo de valores de datos que se pueden almacenar en esa columna.
- Número:solo puede almacenar números, posiblemente con un punto decimal. Puede ser positivo o negativo.
- Carácter:puede almacenar números, letras y puntuación. Access llama a este tipo de datos Texto .
- Fecha:solo puede almacenar datos de fecha y hora.
En algunas implementaciones de bases de datos, existen otros tipos de datos, como imágenes (para imágenes u otros datos). Sin embargo, los tres tipos de datos anteriores son los más utilizados.
Observe que las dos tablas comparten la columna CustomerID y que los valores de la columna CustomerID en la tabla Customer son los mismos que los valores en la columna CustomerID en la tabla Accounts. Esta relación nos permite especificar que el Cliente Nathanial Axe tiene una cuenta de cheques y otra de ahorros que se abrieron el mismo día:1 de diciembre de 1994.
Otro nombre dado a esta relación es Maestro/Detalle . En una relación maestro/detalle, un solo registro maestro (como Cliente 1003, Nathanial Axe) puede tener muchos registros de detalle (las dos cuentas) asociados.
En una relación Maestro/Detalle, es posible que exista un registro Maestro sin ningún Detalle. Sin embargo, es imposible tener un registro de Detalle sin un registro Maestro coincidente. Por ejemplo, es posible que un Cliente no tenga necesariamente ninguna información de cuenta. Sin embargo, cualquier información de la cuenta debe asociarse con un solo Cliente.
Cada tabla también debe tener una columna especial llamada Clave que se utiliza para identificar de forma única filas o registros en la tabla. Los valores en una columna (o columnas) clave nunca se pueden duplicar. En las tablas anteriores, CustomerID es la clave para la tabla Customer, mientras que AccountNumber es la clave para la tabla Accounts.
3 Un ejemplo de negocio
En esta sección, describiremos un ejemplo empresarial que se utilizará como base para los ejemplos a lo largo del tutorial. En las organizaciones, el trabajo de analizar el negocio y determinar la estructura adecuada de la base de datos (tablas y columnas) normalmente lo llevan a cabo los analistas de sistemas. . Un analista de sistemas recopilará información sobre cómo opera el negocio y formará un modelo de los requisitos de almacenamiento de datos. A partir de este modelo, un programador de bases de datos creará las tablas de la base de datos y luego trabajará con los desarrolladores de la aplicación para desarrollar el resto de la aplicación de la base de datos.
Para este tutorial, consideraremos un negocio bancario simple. El banco tiene muchos clientes que abren y mantienen una o más cuentas. Para cada Cliente, mantenemos un registro de su nombre y dirección. También les asignamos un CustomerID único. Asignamos este identificador único tanto por conveniencia como por precisión. Es mucho más fácil identificar a un solo cliente utilizando su CustomerID en lugar de buscar su nombre completo y dirección. Además, es posible que el banco tenga dos clientes con el mismo nombre (por ejemplo, Bill Smith). En tales casos, siempre se puede usar el CustomerID único para diferenciarlos.
De manera similar, a todas las cuentas se les asigna un número de cuenta único. Una cuenta puede ser una cuenta corriente o una cuenta de ahorros. Las cuentas de ahorro ganan intereses, pero las únicas transacciones permitidas son depósitos y retiros. Las cuentas corrientes no generan intereses. Mantenemos la fecha en que se abrió la cuenta. Esto nos ayuda a rastrear a nuestros clientes y puede ser útil para fines de marketing. Finalmente, mantenemos el saldo actual de una cuenta.
En la sección anterior, proporcionamos la estructura y algunos datos de muestra para la tabla Cliente y la tabla Cuentas. Estos se utilizarán para respaldar la parte de almacenamiento de datos de nuestra aplicación bancaria.
Aplicaciones de bases de datos
En cualquier aplicación de base de datos, cada una de las tablas requiere un medio para obtener datos en ellas y para recuperar y modificar los datos en un momento posterior. La forma principal de introducir datos en las tablas es utilizar formularios de entrada de datos. Las formas principales de recuperar datos de tablas o mostrar datos en tablas son mediante consultas o informes. En una aplicación de base de datos completa, todos los formularios e informes están vinculados entre sí en un formulario de navegación:una sola página que tendrá enlaces a cada una de las partes de la aplicación. Una aplicación de base de datos grande puede tener docenas de formularios e informes de ingreso de datos.
Para este tutorial, crearemos un formulario de entrada de datos para cada tabla, una consulta para cada tabla y un informe para cada tabla.
En las siguientes secciones, primero presentaremos cómo iniciar Access y cómo crear una nueva base de datos.
4 Iniciar Microsoft Access
Al igual que con la mayoría de los programas de Windows, Access se puede ejecutar navegando por el menú Inicio en la esquina inferior izquierda del escritorio de Windows.
Para iniciar Access, haga clic en el botón Inicio, luego en el menú Programas, luego muévase al menú de Microsoft Office y finalmente haga clic en el elemento de menú de Microsoft Access. El menú de MS Office Professional se muestra a continuación.
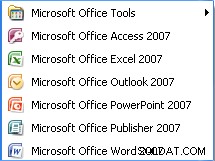
Tenga en cuenta que esta disposición de los menús puede variar según cómo se instaló MS Office en la PC que está utilizando.
Una vez que se esté ejecutando Access, se mostrará una pantalla inicial:
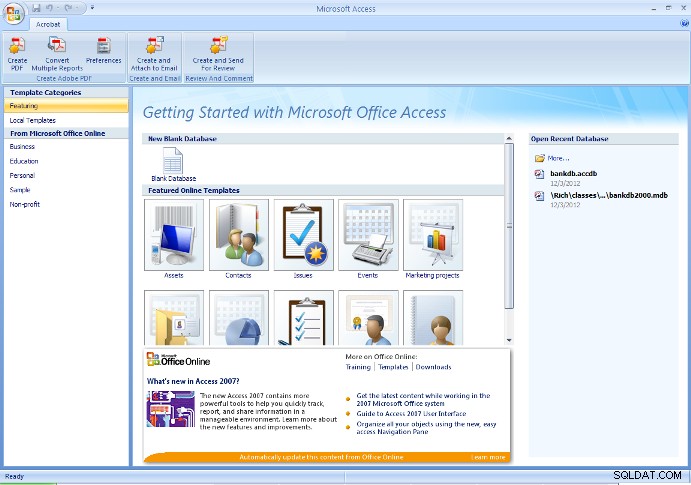
Desde esta pantalla inicial, el usuario puede crear una nueva base de datos (ya sea en blanco o con algunas tablas creadas con el asistente de base de datos), o abrir una base de datos existente.
En general, la primera vez que se inicia un proyecto, se debe crear una nueva base de datos en blanco. Después de ese punto, use Abrir base de datos existente opción para volver a abrir la base de datos creada anteriormente.
Advertencia – Si ha creado previamente una base de datos y luego la vuelve a crear con el mismo nombre, sobrescribirá cualquier trabajo que haya realizado.
A los efectos de este tutorial, si está realizando estos pasos por primera vez, elija la opción para crear una nueva base de datos en blanco como se muestra en la figura anterior.
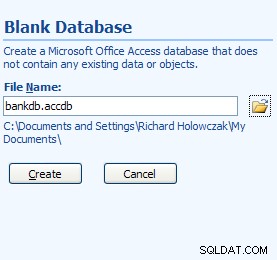
En Access 2007, haga clic en el botón redondo de Office en la esquina superior izquierda y elija Nuevo en el menú desplegable. Complete Nombre de archivo como bankdb.accdb y haga clic en el botón Crear para crear la base de datos como se muestra en la figura a continuación.
Nueva pantalla de base de datos para Access 2007
En el nombre de archivo anterior, bankdb es el nombre elegido para esta base de datos en particular y .accdb es la extensión de nombre de archivo dada para Microsoft DataBase 2007, Archivos de 2010 y 2013.
Es aconsejable mantener el nombre de la base de datos (bankdb en el ejemplo anterior) relativamente corto y no usar espacios u otros signos de puntuación en el nombre de la base de datos. Además, el nombre de la base de datos debe reflejar el contenido de la base de datos.
Una vez creada la nueva base de datos, aparecerá la siguiente pantalla principal de Acceso:
El diseño de la pantalla de MS Access 2007 es significativamente diferente al de las versiones anteriores. La mayoría de las pestañas en la parte superior de la pantalla se han reorganizado. Además, la pantalla principal predeterminada después de crear una nueva base de datos cambia automáticamente a la vista Diseño para crear una nueva tabla.
Las siguientes pestañas aparecerán en la parte superior de la pantalla:
- Pestaña Inicio – Controles para cambiar fuentes, realizar consultas, copiar/pegar/cortar datos, etc.
- Pestaña Crear – Controles para la creación de tablas, formularios, informes, etc.
- Pestaña Datos externos – Controles para cargar datos de otras fuentes de datos en MS Access.
- Pestaña Herramientas de base de datos – Controles para la gestión de bases de datos (seguridad, centralita, etc.)
- pestaña Diseño – Esto aparecerá al diseñar una nueva tabla, formulario, informe, etc.
Tenga en cuenta que las interfaces de Access 2007, 2010 y 2013 son todas similares, aunque la versión que utilice puede parecer ligeramente diferente de las imágenes incluidas en este tutorial.
4.1 Revisión del inicio de Microsoft Access
Para iniciar Microsoft Access:
- Utilice el botón Inicio en la barra de tareas para abrir:Programas -> MS Office -> Microsoft Access
- Para crear una nueva base de datos, elija Base de datos en blanco y especifique un nuevo nombre de archivo para la base de datos. Asegúrese de utilizar un nombre descriptivo para la nueva base de datos. Haga clic en el botón Aceptar para crear la nueva base de datos.
- Para abrir una base de datos existente, elija Abrir una base de datos existente , resalte Más archivos... y haga clic en el botón Aceptar. Luego navegue hasta la unidad, resalte el archivo de base de datos existente en el disco duro o unidad USB y haga clic en el botón Aceptar nuevamente para abrir la base de datos.
Para salir de Access, despliegue el menú Archivo (o el menú Oficina) y seleccione el elemento de menú Salir.
5 Creación y visualización de tablas
Las tablas son las principales unidades de almacenamiento de datos en Access. Recuerde que una tabla se compone de una o más columnas (o campos ) y que una columna dada puede aparecer en más de una tabla para indicar una relación entre las tablas.
Del ejemplo comercial discutido anteriormente, concluimos que dos tablas serían suficientes para almacenar los datos sobre Clientes y sus cuentas bancarias . Ahora damos las instrucciones paso a paso para crear estas dos tablas en Access.
Hay varias formas de crear una tabla en Access. El acceso proporciona asistentes que guían al usuario a través de la creación de una tabla sugiriendo nombres para tablas y columnas. La otra forma principal de crear una tabla es usando la Vista de diseño para definir manualmente las columnas (campos) y sus tipos de datos.
Si bien el uso de los asistentes es una forma rápida de crear tablas, el usuario tiene menos control sobre los nombres de las columnas (campos) y los tipos de datos. En este tutorial, describiremos los pasos para crear una tabla utilizando la Vista de diseño . Se alienta a los estudiantes a experimentar por su cuenta con el asistente Crear tabla.
5.1 Crear una tabla usando la vista de diseño
Para crear una tabla en Access usando la Vista de diseño, realice los siguientes pasos:
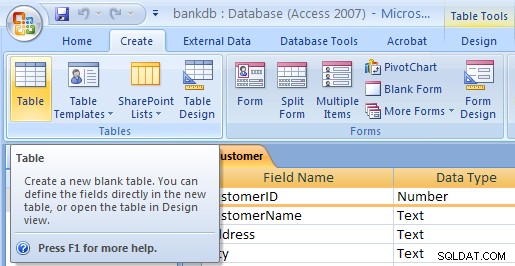
- En Access 2007, 2010 y 2013, la pestaña Crear nueva tabla ya debería estar resaltada y se debería haber creado una nueva tabla llamada table1. Si este no es el caso, haga clic en Crear y haga clic en la Tabla icono. Luego despliegue la Ver menú y elija Vista de diseño .

- Aparecerá la Vista de diseño de tabla. Complete el Nombre de campo , Tipo de datos y Descripción para cada columna/campo de la tabla. El campo CustomerID se completa a continuación:
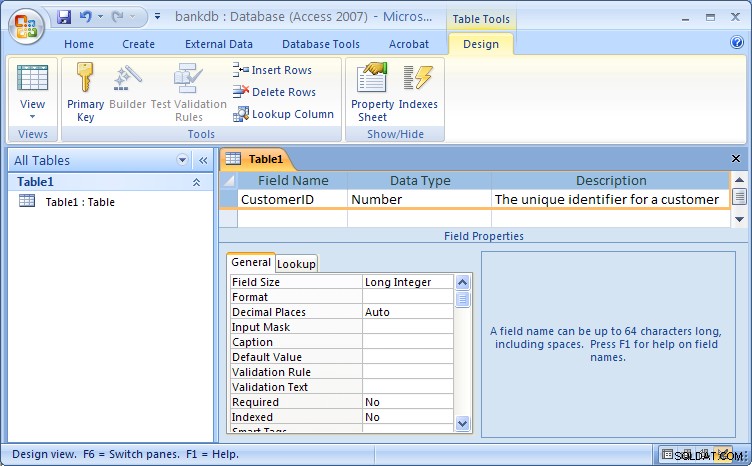
Vista de diseño de tabla para Access 2007Tenga en cuenta que el nombre predeterminado dado para la tabla es Table1 . En un paso posterior, asignaremos un nombre apropiado para esta tabla.
Rellene la información de los campos de la siguiente manera:
Nombre de campo Tipo de datos Descripción ID de cliente Número El identificador único de un cliente Nombre Texto El nombre del cliente Apellido Texto El Apellido del Cliente Dirección de la calle Texto La dirección postal del cliente Ciudad Texto La Ciudad del Cliente Estado Texto El Estado de residencia del Cliente Código postal Texto El código postal del cliente A continuación se muestra una figura que muestra la vista de diseño con la definición de la nueva tabla completada:

El siguiente paso es definir la Clave para la tabla y guardar la tabla.
- Ahora que se han definido todos los campos para la tabla, se debe definir una clave principal. Recuerde que la clave principal se utilizará para identificar de forma única un registro en la tabla (en este caso, un cliente). Resalte el ID de cliente y haga clic en el botón Clave principal en la barra de botones
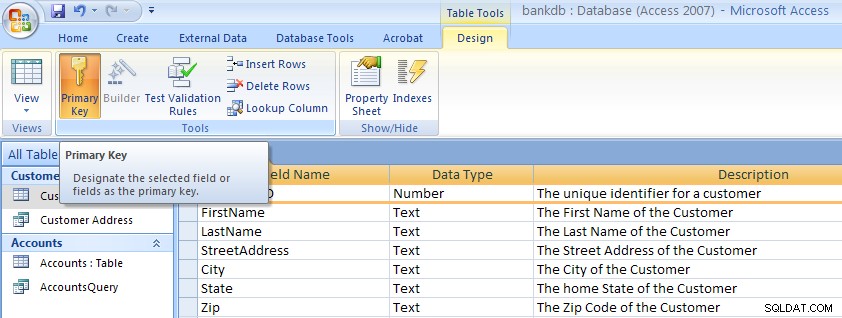 Observe que aparece una pequeña clave junto al nombre del campo en el lado izquierdo. Nota:para eliminar una clave principal , simplemente repita este procedimiento para desactivar la tecla principal.
- Como paso final, se debe guardar la tabla. Despliegue el menú de Office y elija el elemento de menú Guardar como. Aparecerá un cuadro de diálogo donde se debe especificar el nombre de la nueva tabla. Tenga en cuenta que Access da un nombre predeterminado como Tabla1 o Tabla2 . Simplemente escriba sobre este nombre predeterminado con el nombre de la tabla. Para este ejemplo, nombre la tabla:Cliente Luego haga clic en el botón Aceptar.
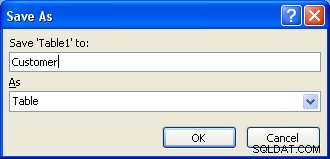
En este punto, la nueva tabla Cliente se ha creado y guardado.
Una nota sobre los campos de nombres (columnas) en MS Access
Al definir los campos (columnas) de una tabla, es importante utilizar nombres de campo que proporcionen una comprensión clara del contenido de datos de la columna. Por ejemplo, ¿el campo CNO indica un número de cliente o un número de contenedor?
Los nombres de campo en Access pueden tener hasta 64 caracteres y pueden contener espacios. Sin embargo, se desaconseja enfáticamente el uso de espacios en los nombres de campos y tablas . Si desea que los nombres de los campos sean más fáciles de leer, considere usar un carácter de subrayado para separar las palabras. Sin embargo, asegúrese de que no aparezcan espacios antes o después del guión bajo.
La siguiente tabla resume algunas formas diferentes de dar nombres de campo:
| Descripción | Malo | Bien |
|---|---|---|
| Identificador único para un cliente | CID | ID de cliente o ID_cliente |
| Descripción de un producto | PDESC | Descripción del producto |
| Número de teléfono de la casa del empleado | Employee_home_telephone_number | Teléfono de casa |
| Número de cuenta bancaria | BA# | Número de cuenta |
5.2 Ejercicio:creación de una tabla
Crear las Cuentas siguiendo los mismos pasos que se usaron para crear la tabla Cliente.
- Haga clic en la pestaña Crear y luego haga clic en la Tabla botón.
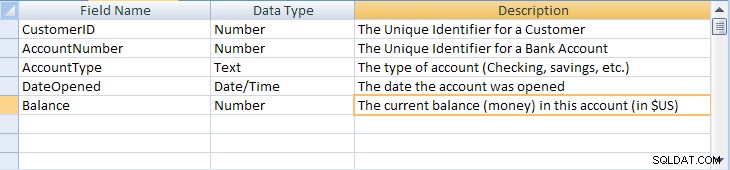
- Despliegue el menú Ver y elija Diseño. Aparecerá la Vista de diseño de tabla. Complete el Nombre de campo , Tipo de datos y Descripción para cada columna/campo en la tabla Cuentas.
Nombre de campo Tipo de datos Descripción ID de cliente Número El identificador único de un cliente Número de cuenta Número El identificador único de una cuenta bancaria Tipo de cuenta Texto El tipo de cuenta (cheques, ahorros, etc.) Fecha de apertura Fecha La fecha en que se abrió la cuenta Saldo Número El saldo actual (dinero) en esta cuenta (en dólares estadounidenses) A continuación se muestra una figura que muestra la vista de diseño con la definición de la nueva tabla completada:
- Defina una clave principal para la tabla Cuentas. Haga clic en el Número de cuenta campo con la derecha botón del mouse y seleccione Clave principal en el menú emergente.
- Guarde la nueva tabla Cuentas bajando el menú Archivo y eligiendo el elemento de menú Guardar. Complete el nombre de la tabla:Cuentas Luego haga clic en el botón Aceptar.
Tenga en cuenta que hay una serie de pasos adicionales que se pueden tomar para mejorar y embellecer las tablas en MS Access, incluida la especificación de valores predeterminados, la creación de valores de búsqueda y el enmascaramiento de entradas de datos para seguir un patrón específico. Los detalles no son importantes para este tutorial actual, pero si está interesado, consulte la página de Diseño de tabla de MS Access avanzado vinculada aquí.
5.3 Visualización y adición de datos a una tabla
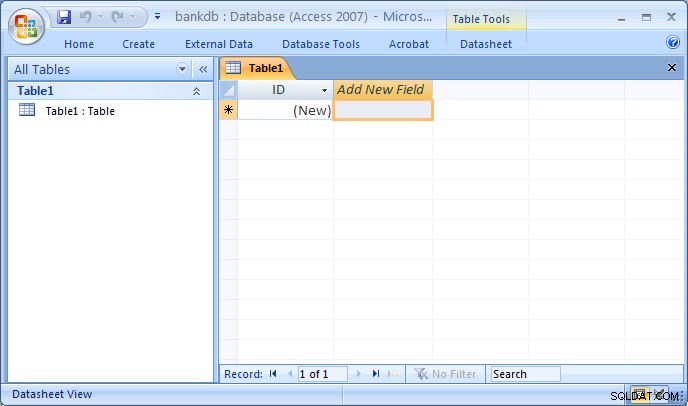
Los datos pueden agregarse, eliminarse o modificarse en las tablas usando una simple pantalla similar a una hoja de cálculo. Para abrir esta vista de los datos de una sola tabla, resalte el nombre de la tabla y luego haga doble clic en el nombre de la tabla.
En esta vista de la tabla Cliente, que se muestra en la siguiente figura, los campos (columnas) aparecen en la parte superior de la ventana y las filas o registros aparecen debajo. Esta vista es similar a cómo se diseñaría una hoja de cálculo.
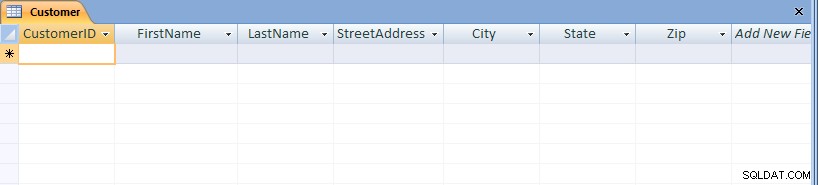
Tenga en cuenta que en la parte inferior de la ventana se muestra el número de registros. En este caso, como la tabla se acaba de crear, solo aparece un registro en blanco.
Para agregar datos a la tabla, simplemente ingrese valores para cada uno de los campos (columnas). Presione la tecla Tab para moverse entre los campos dentro de un registro. Use las teclas de flecha hacia arriba y hacia abajo para moverse entre los registros. Ingrese los datos como se indica a continuación:
| ID de cliente | Nombre | Apellido | Dirección de la calle | Ciudad | Estado | Código postal |
|---|---|---|---|---|---|---|
| 1001 | José | Smith | 123 Lexington | Smithville | KY | 91232 |
| 1002 | Alberta | Jones | Avenida Davis 12 | Smithville | KY | 91232 |
| 1003 | Natanael | Hacha | 443 Molinillo Ln. | Broadville | GA | 81992 |
| 1004 | Paulina | Constructor | 661 Parker Rd. | Streetville | GA | 81990 |

Para guardar los nuevos datos, despliegue el menú de Office y elija Guardar.
Para navegar a otros registros en la tabla, use la barra de navegación en la parte inferior de la pantalla:
Para modificar los datos existentes, simplemente navegue hasta el registro de interés y vaya al campo correspondiente. Utilice las teclas de flecha y las teclas de borrar o retroceder para cambiar los datos existentes.
Para eliminar un registro, primero navegue hasta el registro de interés. Luego despliegue el menú Editar y elija el elemento de menú Eliminar.
Para cerrar la tabla y volver a la pantalla principal de Access, despliegue el menú Archivo y elija el elemento de menú Cerrar.
5.4 Ejercicio:agregar datos a una tabla
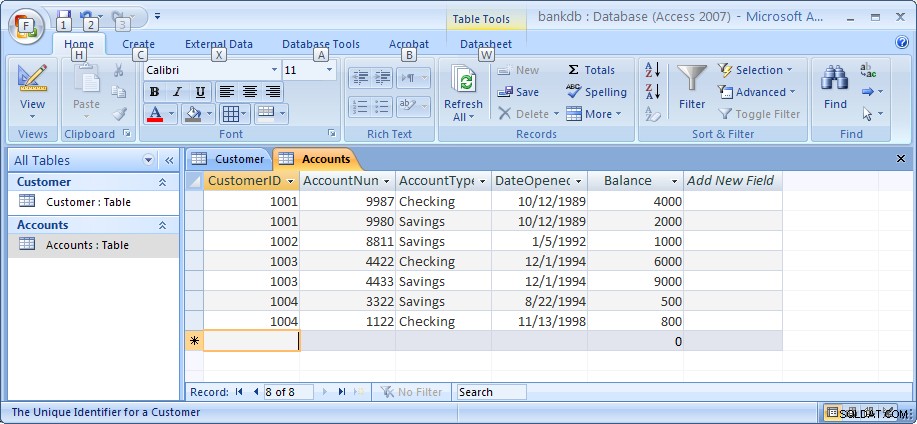
Para este ejercicio, abra la tabla Cuentas y agregue datos para las siete cuentas que se muestran en la sección 2. Asegúrese de ingresar los datos exactamente como se muestra, incluida la capitalización de los datos en el campo Tipo de cuenta. por ejemplo, escriba Ahorros en lugar de ahorros o AHORROS.
Tenga en cuenta que al ingresar las fechas, escriba los cuatro dígitos completos del año. De forma predeterminada, Access muestra los 4 dígitos del año (la versión anterior de Access solo mostraba dos dígitos).
Asegúrese de guardar los datos cuando haya terminado. La siguiente figura muestra la tabla Cuentas y los datos como deberían aparecer cuando haya terminado con este ejercicio.
En este punto del tutorial, hemos creado dos tablas, Clientes y Cuentas, y hemos agregado datos a cada una. En las secciones subsiguientes, cubriremos cómo consultar e informar sobre los datos en las tablas y cómo crear un formulario de ingreso de datos fácil de usar usando los asistentes de Access.
Nota:Mi tutorial sobre Diseño de tablas avanzado de MS Access se puede encontrar en este enlace. Es posible que desee comprobarlo después de haber completado el resto de este tutorial.
5.5 Creación de relaciones entre tablas
Recordemos que una de las principales características de las bases de datos relacionales es el hecho de que todas las tablas están relacionadas entre sí. En la base de datos del Banco hasta el momento, la tabla Clientes está relacionada con la tabla Cuentas en virtud del campo CustomerID que aparece en ambas tablas. Access tiene un medio para hacer explícita esta relación mediante la pantalla Relaciones. Access utiliza esta información al diseñar informes, formularios y consultas que requieren que se muestre más de una tabla.
Para comenzar, asegúrese de que la tabla Cuentas y la tabla Clientes estén cerradas. Access detendrá la creación de cualquier relación si la tabla está abierta actualmente. Para cerrar una tabla, haga clic con el botón derecho en el nombre de la tabla en la pestaña que se encuentra sobre la tabla y elija el elemento del menú Cerrar, o haga clic en la pequeña X que se encuentra a la derecha sobre la tabla.

A continuación, muestre la pantalla Relaciones haciendo clic en la pestaña Herramientas de la base de datos y luego haga clic en el botón Relaciones como se muestra a continuación. 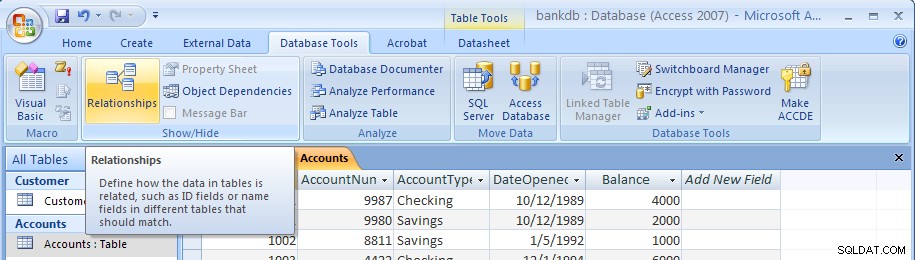
La pantalla Relaciones en blanco aparecerá de la siguiente manera:
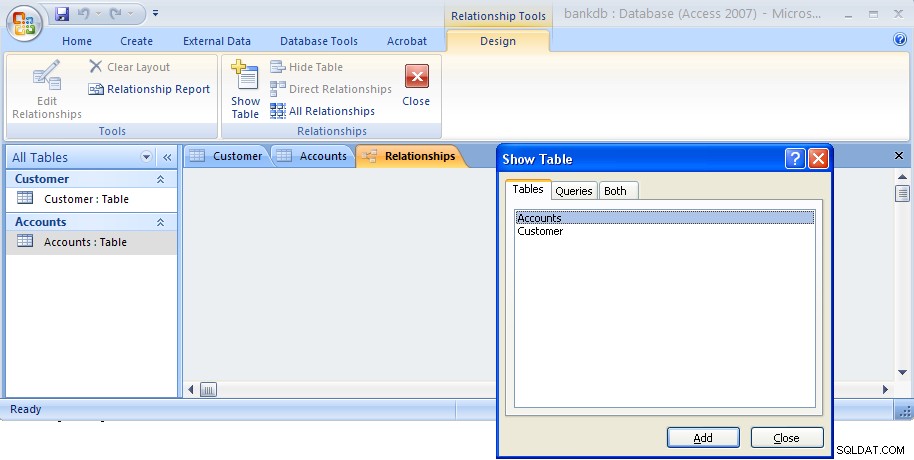
El cuadro de diálogo Mostrar tabla aparecerá de forma predeterminada. Resalte la tabla Clientes y la tabla Cuentas como se muestra a continuación y luego haga clic en el botón Agregar.

Luego haga clic en el botón Cerrar para cerrar este cuadro de diálogo. Ahora volverá a aparecer la pantalla Relaciones con las dos tablas que se muestran a continuación:
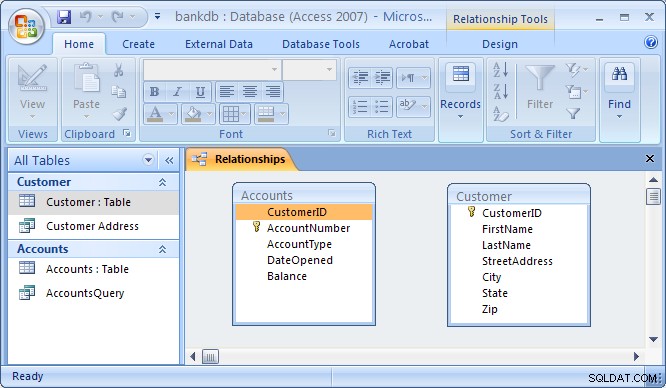
Para conectar la tabla Clientes con la tabla Cuentas para formar una relación, haga clic en el campo CustomerID en la tabla Clientes y arrástrelo sobre el campo CustomerID en la tabla Cuentas. Al soltar el botón del mouse, aparecerá el cuadro de diálogo Editar relaciones como se muestra a continuación:
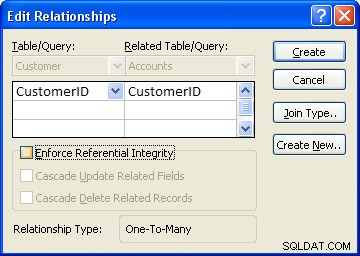
Access hará todo lo posible para determinar el Tipo de relación (casi siempre seleccionará Uno a muchos ). Para este ejemplo, Access sabe que CustomerID es una clave de la tabla Cliente, por lo que elige este campo como el lado "Uno". Esto hace que la tabla Cuentas esté en el lado "Muchos" como Uno el cliente puede tener Muchos cuentas.
One additional step to be taken is the check off the box labeled “Enforce Referential Integrity”. This option puts constraints into effect such that an Accounts record can not be created without a valid Customer record, and Access will also prevent a user from deleting a Customer record if a related Accounts record exists. At this point, click on the Create button to create the relationship. The Relationships screen should reappear with the new relationship in place as follows:
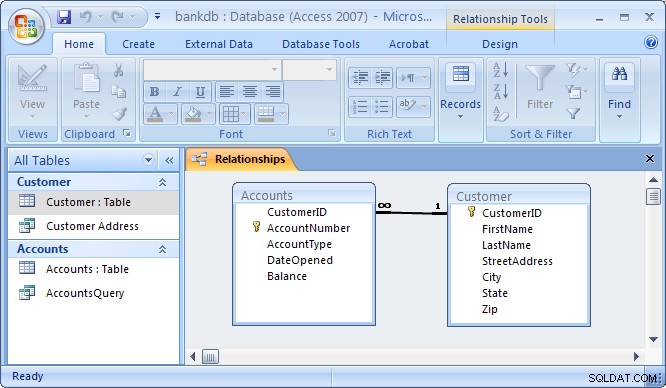
Note the symbols “1” (indicating the “One” side) and the infinity symbol (indicating the “Many” side) on the relationship. Close the relationships screen and select Yes to save the changes to the Relationships layout.
If the relationship does not appear in the above fashion, highlight it and press the delete key to delete it. Then go back to the table design view and make certain that the CustomerID field is designated as the key of the Customers table. Then go back to the Relationships screen and try to recreate the relationship.
5.6 Review of Creating and Viewing Tables
Creating a new table requires the following steps:
- Click on the Tables tab on the Access main screen
- Click on the New button.
- Choose the Design View and click the OK button.
- Fill in the name, data type and description of each of the fields in the table.
- Designate a primary key by clicking on one of the fields with the right mouse button and then choose Primary Key from the pop-up menu.
- Save the table by pulling down the File menu and choosing Save.
- Close the new table by pulling down the File menu and choosing Close.
To change the design of an existing table (e.g., to add, change or delete a field):
- Click on the Tables tab on the Access main screen
- Highlight the name of the table to be modified and click on the Design button.
- Make the necessary changes.
- Save the table by pulling down the File menu and choosing Save.
- Close the table by pulling down the File menu and choosing Close.
To add, delete or change data in an existing table:
- Click on the Tables tab on the Access main screen
- Highlight the name of the table to be modified and click on the Open button.
- Make the necessary changes to the data.
- Save the table data by pulling down the File menu and choosing Save.
- Close the table by pulling down the File menu and choosing Close.
To create or edit relationships between tables:
- Pull down the Tools menu and select the Relationships menu item.
- To display tables, right click and choose Add Tables
- To create new relationships, drag a key field from one table and drop it on the associated field in another table
- To edit an existing relationship, double click on the relationship line.
- To delete an existing relationship, click on the relationship line and press the delete key.
6 Creating and Running Queries
Queries are a fundamental means of accessing and displaying data from tables. Queries can access a single table or multiple tables. Examples of queries for our bank database might include:
- Which Customers live in Georgia ?
- Which Accounts have less than a $500 balance ?
- What is the total amount of money deposited by each Cusomter?
- Which Checking account has the largest balance?
Queries can be used to carry out other tasks such as for creating formatted reports and data entry forms, and for exporting subsets of data to Excel or another software program.
In this section, we show how to use the Access Wizards to create queries for a single table and for multiple tables.
6.1 Single Table Queries
In this section, we demonstrate how to query a single table. Single table queries are useful to gain a view of the data in a table that:
- only displays certain fields (columns) in the output
- sorts the records in a particular order
- performs some statistics on the records such as calculating the sum of data values in a column or counting the number of records, or
- filters the records by showing only those records that match some criteria. For example, show only those bank customers living in GA.
Creating a query can be accomplished by using either the query design view or the Query wizard. In the following example, we will use the query wizard to create a query.
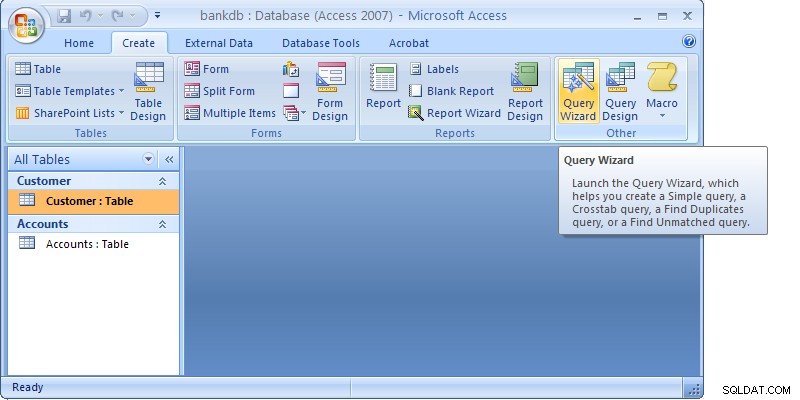
To create a new query, click on the Create tab. Then click on the Query wizard button.
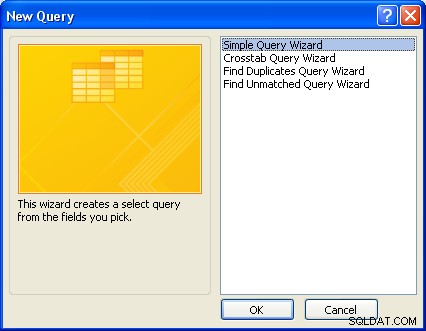
When the Query wizard appears, highlight the Simple Query Wizard selection and click on the OK button.
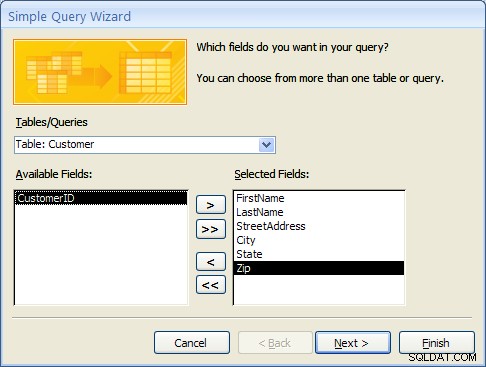
The first step in the Simple Query wizard is to specify the table for the query and which fields (columns) should be displayed in the query output. Three main sections of this step are:
- Tables/Queries – A pick list of tables or queries you have created.
- Available Fields – Those fields from the table that can be displayed.
- Selected Fields – Those fields from the table that will be displayed.
For this example, pull down the Tables/Queries list and choose the Customer table. Notice that the available fields change to list only those fields in the Customer table. This step is shown below:

From the list of Available fields on the left, move the FirstName, LastName, StreetAddress, City and State fields over to the Selected Fields area on the right. Highlight one of the fields and then click on the right arrow button  in the center between the two areas. Repeat this for each of the four fields to be displayed. When done with this step, the wizard should appear as below:
Click on the Next button to move to the next and final step in the Simple Query wizard.
In the final step, give your new query a name. For this example, name the query:Customer Address
At this point, the wizard will create the new query with the option to either:
- Open the query to view information – that is, the wizard will execute the query and show the data.
- Modify the query design – the wizard will switch to the Design View to allow further modification of the query.
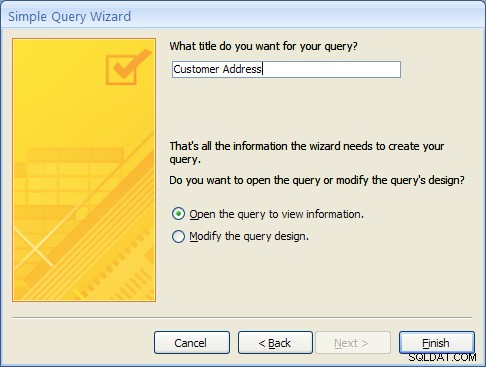
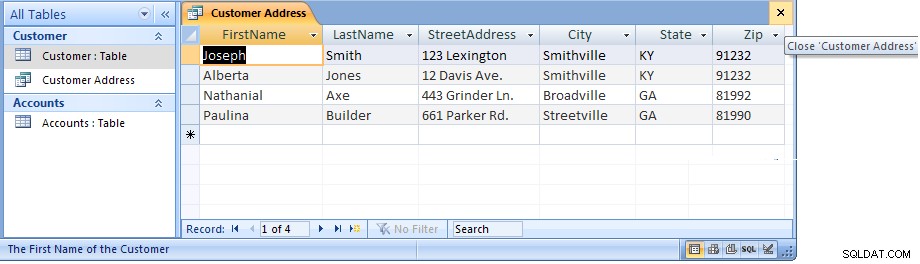
For this example, choose Open the query to view information and click on the Finish button. When this query executes, only the customer’s name, address, city and state fields appear, however, all of the rows appear as shown in the figure below:

Close this query by clicking on the X in the upper right corner of the query results as shown in the figure below:
The Access main screen showing the Queries tab should appear. Note the new query Customer Address appears under the Customers table.
6.1 Single Table Queries (Continued)
In the following example, we will modify the Customer Address query to only display customers in a certain state. To accomplish this, we will make use of the Query Design View.
Open up the Customer Address query in the design view by right-clicking on the name of the query. Then select the Design View menu item as shown below.
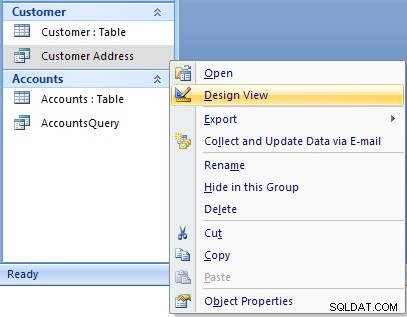
The design view will appear as in the figure below:
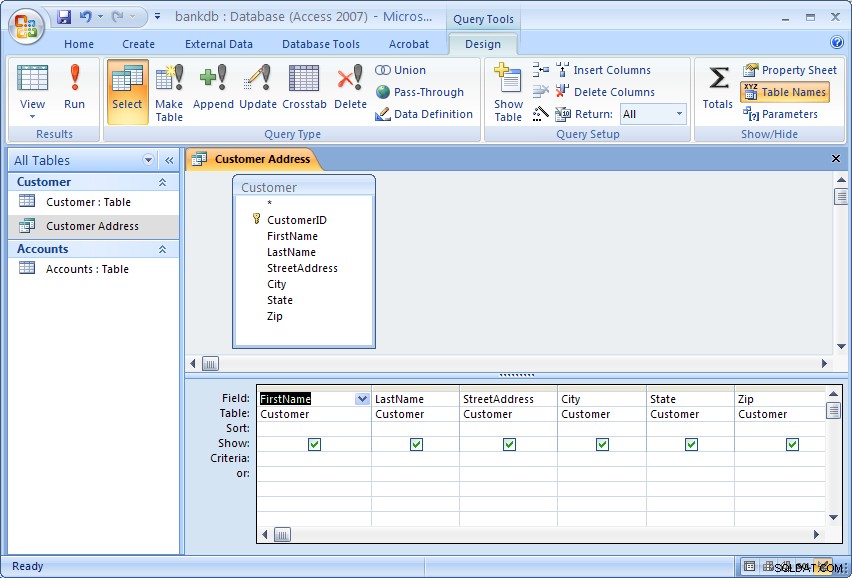
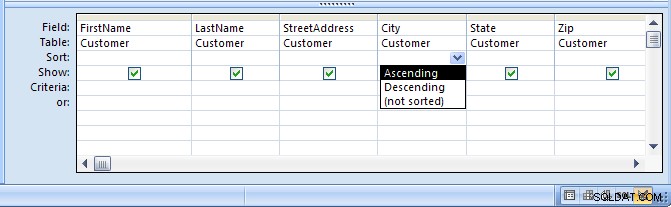
The Query Design view has two major sections. In the top section, the table(s) used for the query are displayed along with the available fields. In the bottom section, those fields that have been selected for use in the query are displayed.
Each field has several options associated with it:
- Field – The name of the field from the table
- Table – The table the field comes from
- Sort – The order in which to sort on this field (Ascending, Descending or Not Sorted)
- Show – Whether or not to display this field in the query output
- Criteria – Indicates how to filter the records in the query output.
For this example, we will filter the records to only display those customers living in the State of Georgia (GA). We will also sort the records on the City field.
To sort the records on the City field, click in the Sort area beneath the City campo. Choose Ascending from the list as shown in the figure below:
To filter the output to only display Customers in Georgia, click in the Criteria area beneath the State field and type the following statement: ='GA'
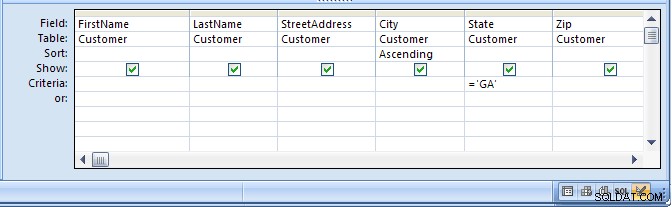
The ='GA' statement tells Access to only show those records where the value of the State field is equal to ‘GA’. Note the use of single quotes to surround the characters.
Run the query by clicking on the Run button (with the large red exclamation point). The output is shown in the figure below:
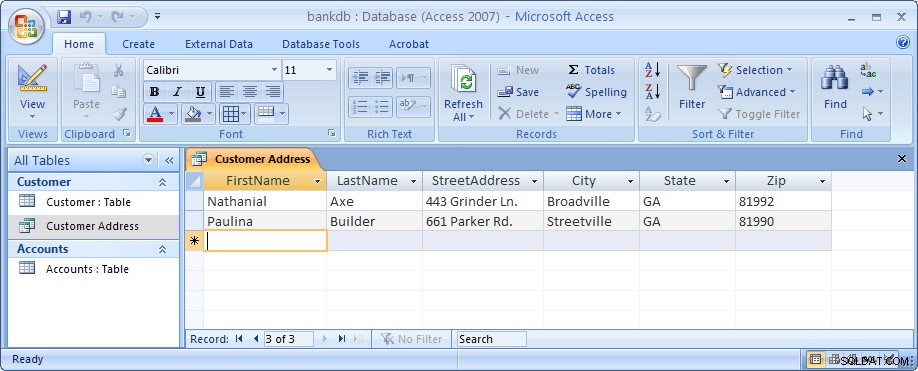
Finally, save and close this query to return to the Access main screen.
6.2 Exercise:Single Table Queries
For this exercise, use the Simple Query wizard to create a query on the Accounts table showing just the AccountNumber, AccountType and Balance fields.
- From the Access main screen, click on the Create tab. Then click on the Query Wizard button.
- Choose the Simple Query wizard option and click on the OK button.
- Under Table/Queries:choose the Accounts table. Then move the AccountNumber, AccountType and Balance fields over to the Selected fields area. Then click the Next button.
- In the next panel, you will be asked to choose between a detail or summary query. Choose detailed query and click on the Next button.
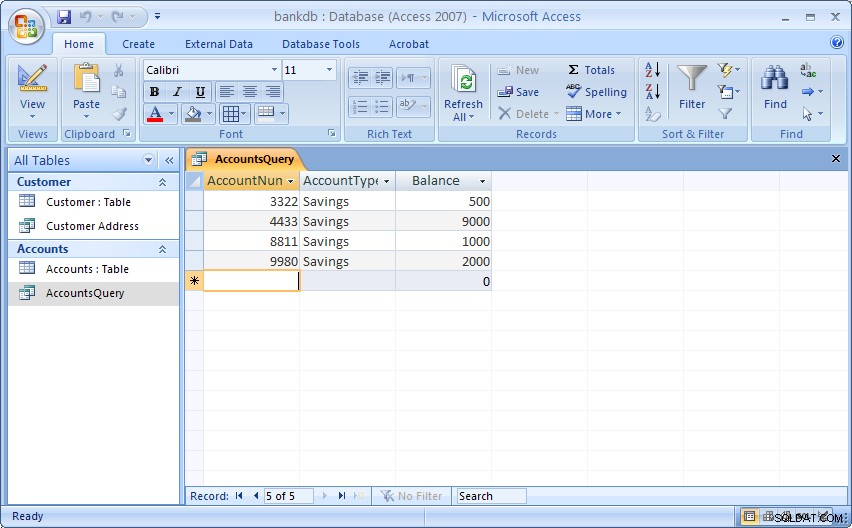
- Name the new Query :AccountsQuery and click on the Finish button.
The output is shown below:

Close this query by pulling down the Office menu and choosing Close.
In the next part of the exercise, we will modify the query to sort the output on the account number and only display the Savings accounts.
- From the Queries tab on the Access main screen, highlight the AccountsQuery and click on the Design button.
- Change the Sort order for the AccountNumber field to Ascending.Add the following statement to the Criteria:are under the AccountType field:=‘Savings’
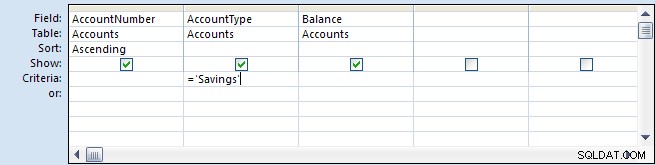
- Run the query by double-clicking on the AccountsQuery name. The output is shown below:
- Finally, save and close the query to return to the Access main screen.
6.3 Multiple Table Queries
Up to this point, queries involving only one table have been demonstrated. It is almost a given that queries will need to involve more than one table. For this example, assume that a manager would like to see a list of all of the customers and the type of account(s) that each one maintains at the bank. Such a query requires data from both the Customers table as well as the Accounts table. In such queries, Access will rely on the Relationships established between tables to guide how the data will be assembled to satisfy the query.
Before proceeding with these next instructions, make certain the One-to-Many relationship between the Customers and Accounts table has been created (see section 5.5 Creating Relationships for a review of this process).
To start the process of creating a multiple table query, highlight the Create tab and click on the Query Wizard button to create a new query. Select the “Simple Query Wizard” option as was done previously.
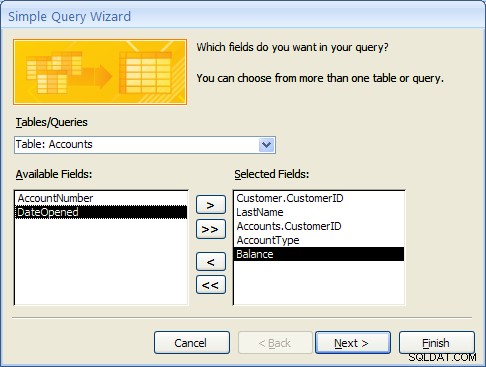
When the simple query wizard appears, select the CustomerID and LastName fields from the Customers table, then switch the Tables/Queries selection to the Accounts table and select the CustomerID, AccountType and Balance fields from the Accounts table. The result from this step is down below:
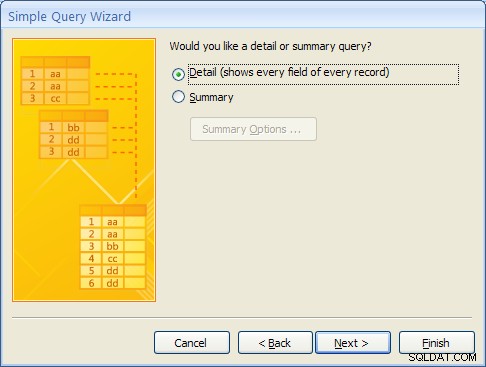
Click the Next button to continue. In the next step of the wizard, an option will appear to provide some level of Summary. For this example, leave the default at “Detail …” as shown below and then click on the Next button.
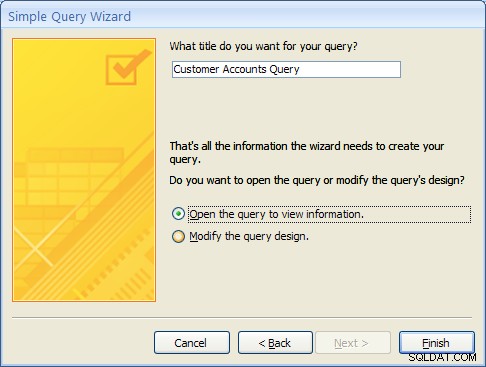
In the final step of the wizard, name the query “Customer Accounts Query” and click on the Finish button. The multiple table query results should appear as follows:
MS Access knows how to line up (or “join”) the accounts table to the Customer table for this query due to the relationship that was created when the tables were first defined.
As with single table queries demonstrated previously, one can change the query definition in design view by adding filters (e.g., show account information for all customers in ‘GA’).
6.4 Exercise:Multiple Table Queries
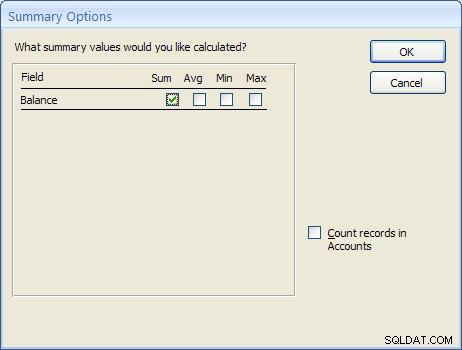
For this exercise, create a new query called “Accounts Summary Query” that joins the Customers table (include the CustomerID and LastName fields) with the Accounts table (include the Balance field only). In the second step of the wizard, click on the Summary choice (instead of Details) and then click on the Summary Options… button. Check off all of the Summary option boxes such as Sum , AVG , Min and Max as shown in the figure below:
The resulting query should appear as follows:
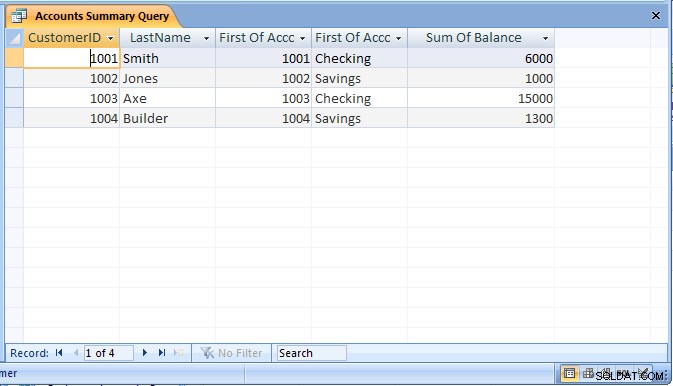
Be sure to save the query as “Accounts Summary Query”.
6.5 Review of Creating and Running Queries
In this section, the basic steps for creating and running queries were introduced. The query wizard can be used to create simple queries that access a single table. It is also possible to then modify the query to sort or filter the records.
Creating a query using the query wizard:
- From the Access main screen, click on the Queries tab. Then click on the New button.
- From the Queries tab on the main Access screen, click on the New button and choose the Simple Query wizard option.
- Under Table/Queries:choose the appropriate table for the query and then indicate which fields in the table will appear in the query output.If querying more than one table, change the Table/Queries:selection to display additional tables and select the necessary fields.
- If the table contains numeric fields, either detailed or summary information may be specified for the query.
- Finally, name the new query and click on the Finish button.
As a final note, Forms and Reports can be created based on existing queries.
7 Creating and Running a Data Entry Form
Data entry forms are the primary means of entering data into tables in the database. In a previous section, we described how to add data to a table using a spreadsheet-like view of the data. Data entry forms offer a more user-friendly interface by adding labels for each field and other helpful information.
Access provides several different ways of creating data entry forms. These include:
- Creating the forms by hand using a Design View
- Creating a default form based on all of the fields available in a table or a query
- Creating a form based on a number of different wizards that walk the user through the forms creation process.
As with queries, a data entry form can be based on a single table or it can work on multiple tables at the same time.
In this section, we cover the basic steps for using a wizard to create a data entry form based on a single table. After this exercise, a multiple-table form is demonstrated.
7.1 Creating a Single Table Form using the Wizard
In this example, we will create a simple data entry form for the Customer table. To begin the process, click on the Create tab on the Access main screen. As with the other components in Access, there are buttons for creating a New form, Open an existing form and Design an existing form. For this example, click on the New button to create a new form.
Several buttons for creating a new form will appear. For this tutorial, choose the Form wizard.
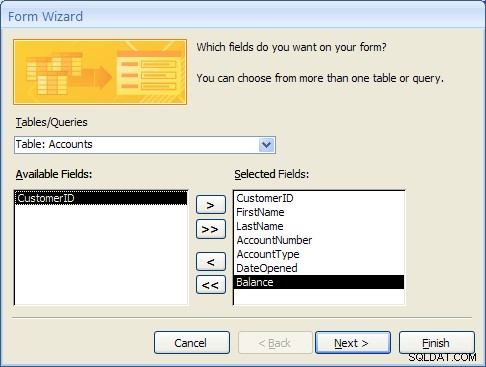
In the first step of the Form wizard, we need to specify the fields from the Customer table that will appear on the form. In this case, we want all of the fields to appear. Move each of the fields from the Available Fields side over to the Selected Fields side as in the following figure. Then click on the Next button.

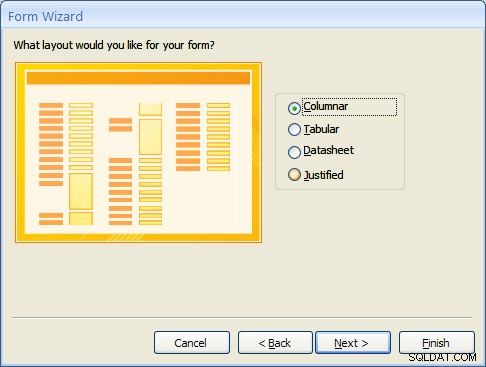
Forms can have several different layouts or arrangement of the labels and fields on the screen.
- Columnar – Places the labels to the left of each field. This is similar to a paper form. This layout is suitable for viewing data one record at a time.
- Tabular – Places the field labels at the top of the screen and the records are displayed below. This is similar to how a spreadsheet would display the data and is suitable for displaying multiple records of data at a time.
- Datasheet – The data appears in the same fashion as when viewing or adding data to a table.
- Justified – Places the labels above each field with the fields spread out on the form. This is suitable for viewing a single record at a time as with the columnar layout.
For this example, choose the columnar layout as shown in the figure below and click on the Next button.
At this point, MS Access 2007 and 2010/2013 versions are a bit different. Access 2007 will show several sample display styles that determine how the form will appear, including elements such as fonts, colors and the background used in the form. Access 2010 and 2013 skips this step in this wizard and provides styles that can be applied to the form in Design mode. For this example, for MS Access 2007, select the Office style as shown below and click on the Next button.

As a final step, give this new form the name:CustomerDataEntry and then click on the Finish button as shown below:
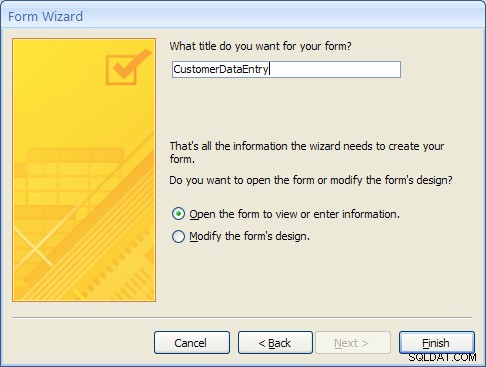
The new form will be created by the wizard and then opened. It should appear as in the figure below:
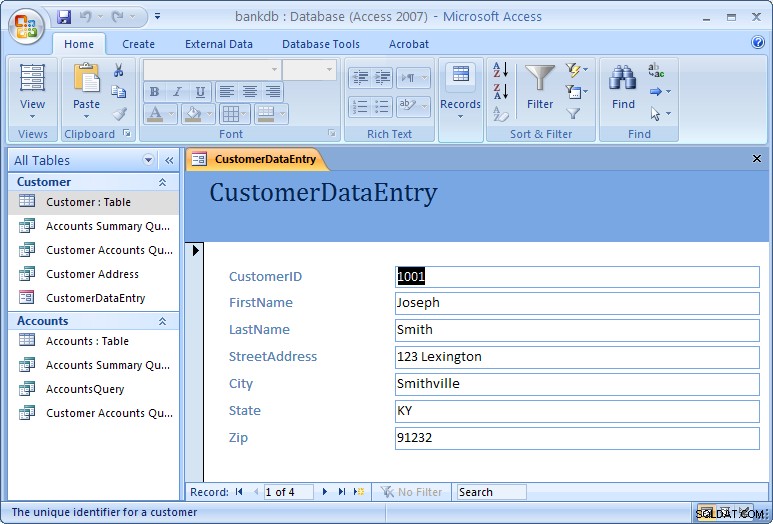
Use the tab key to navigate between fields in the form. To move to the next or previous record, use the record navigation bar at the bottom of the form:
The buttons on the navigation bar perform the following functions:
 | Go to the first record. |
 | Go to the previous record. |
 | Go to the next record. |
 | Go to the last record.  Go past the last record to add a new record. Go past the last record to add a new record. |
To close the form and return to the Access main screen, pull down the File menu and choose Close.
To open the form at any time, highlight the form name under the Forms tab on the Access main screen and click on the Open button.
One quick final note on forms. When the form is created, MS Access looks at how the table is designed and creates the form based on the properties of the table. If you make any changes to the table, you will need to re-create the form again in order to see those table changes reflected in the form. One example where this might happen is is if you change a column in your table from a text box to a combo box, or if you add or remove any columns from your table.
7.2 Exercise:Creating a Single Table Form
For this exercise, we will create a data entry form for the Accounts table created in a previous exercise.
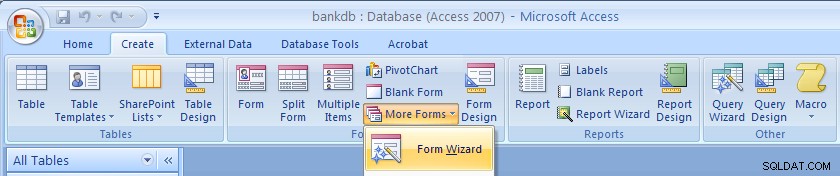
- Click on the Create tab on the Access main screen and then click on the More Forms… button and the “Forms Wizard” to create a new form.
- Select the Accounts table and all of the available fields and click on the Next button.
- Choose a Tabular layout and click on the Next button.
- For Access 2007 choose the Office style and click on the Next button.
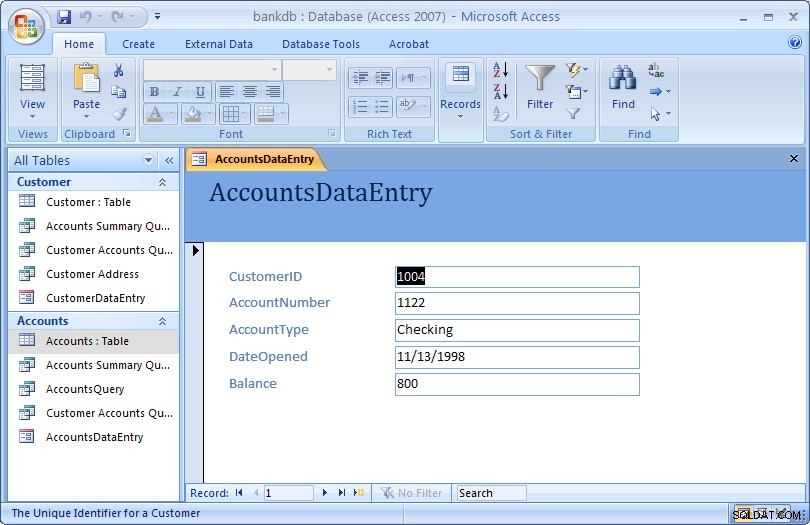
- Name the form:AccountsDataEntry Then click on the Finish button to create, save and view the new form.
The new form is shown in the figure below:
Close the form and return to the Access main screen, by pulling down the File (or Office) menu and choosing Close.
7.3 Review of Creating and Running a Data Entry Form
The basic steps for creating a simple data entry form are:
- Choose a table and a form wizard
- Specify the fields (columns) that will appear in the form
- Specify the layout for the form
- Specify the style (fonts/colors, etc.) for the form
- Save, create and run the new form
In this section we covered the basic steps required to create and run a data entry form. Access provides wizards which are adept at building simple forms with a minimal amount of work. More advanced work on forms would concentrate on using the Design View to change a form’s appearance and to add or remove fields and labels once a form is created. A more advanced tutorial on MS Access Forms Design is linked here.
8 Creating and Running a Report
Reports are similar to queries in that they retrieve data from one or more tables and display the records. Unlike queries, however, reports add formatting to the output including fonts, colors, backgrounds and other features. Reports are often printed out on paper rather than just viewed on the screen. They can also be attached to e-mail and exported and posted as web pages.
As with data entry forms, there are a number of ways to create reports in MS Access:
- A report can be created “by hand” in Design view
- A default report can be created automatically based on all of the firleds for a given table.
- A report can be created using the Create Report wizard.
In this section, we cover how to create simple reports using the Report wizard.
8.1 Creating a Single Table Report using the Wizard
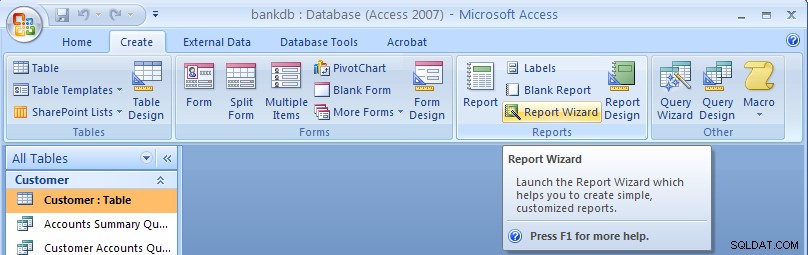
In this example, we will create a simple report for a single table using the Report wizard. As with the Queries and Forms, we begin by selecting the Create tab from the Access main screen.
To create a new report, click on the Report Wizard button.
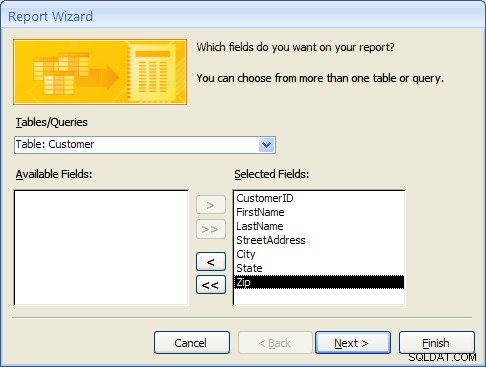
In the next step of the Report wizard, is used to specify the fields from the Customer table that will appear on the report. In this case, we want all of the fields to appear. Move each of the fields from the Available Fields side over to the Selected Fields side as in the following figure. Then click on the Next button.
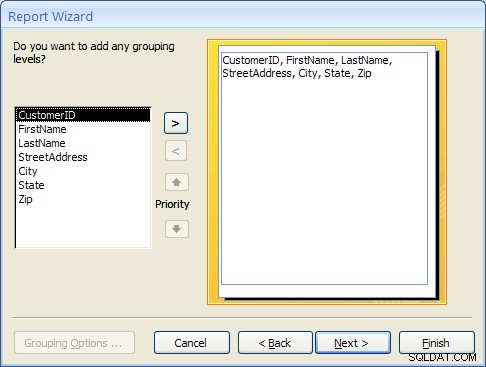
In the next step, we have the opportunity to add Grouping Levels to the report. A grouping level is where several records have the same value for a given field and we only display the value for the first records. In this case, we will not use any grouping levels so simply click on the Next button as shown below.
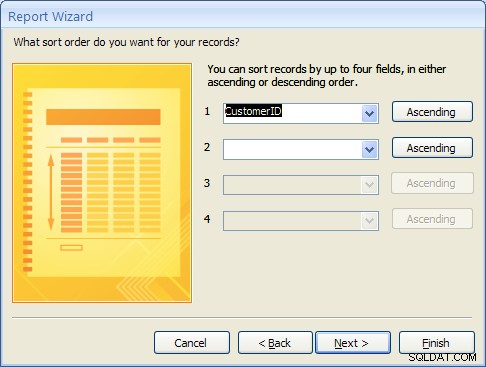
In the next step, the sorting order of the report can be specified. For this example, we will sort the records on the CustomerID field. To achieve this, pull down the list box next to the number 1:and choose the CustomerID field as shown in the figure below. Then click on the Next button.
8.1 Creating a Single Table Report using the Wizard (Continued)
The next step is to specify the layout of the report. The three options are:
- Columnar – Places the labels to the left of each field. This is similar to a paper form.
- Tabular – Places the field labels at the top of the report page and the records are displayed below. This is similar to how a spreadsheet would display the data.
- Justified – Places the labels above each field with the fields spread out on the report page.
Generally, reports use the tabular layout. For this example, choose Tabular layout and set the page Orientation to Landscape so that all of the fields will fit across one page. This is shown in the figure below. Click on the Next button to continue.

In the next step, the style of the report can be selected. For this example, choose the Office style and click on the Next button to continue.

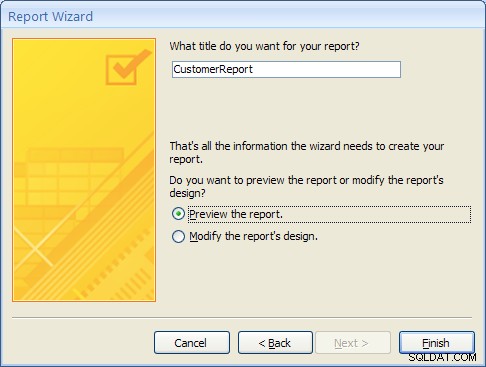
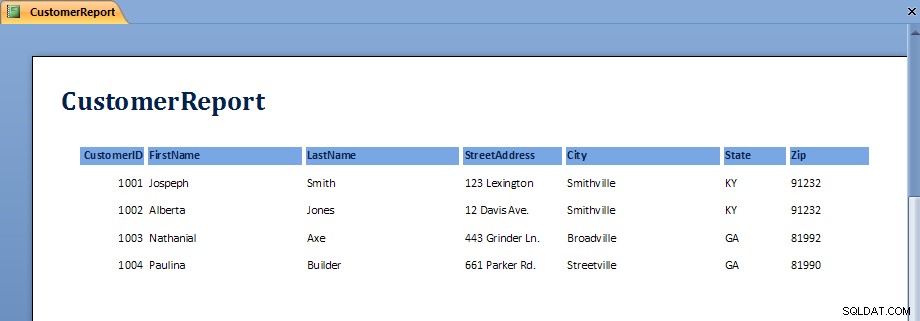
Finally, give a name for the new report:CustomerReport and then click on the Finish button to create, save and display the new report.
The output from the report is shown in the figure below. Note that on some screens, the last field, Zip, may not display without scrolling over to the right.
Once the report is displayed, it can be viewed, printed or transferred into Microsoft Word or Microsoft Excel. The button bar across the top of the screen has the following functions:
 | Print the report |
 | Zoom into a region of the report |
 | Display the report as one, two or multiple pages |
 | Zoom into or out of the report |
 | Transfer the report into MS Word |
 | Close the report |
To close the report and return to the Access main screen, click on the Close button.
8.2 Exercise:Creating a Single Table Report
For this exercise, we will create a report showing all of the Accounts information.
- From the Access main screen, click on the Create tab and Click on the Report wizard.
- Select all of the fields in the Accounts table by moving them all over to the Selected Fields side and then click Next
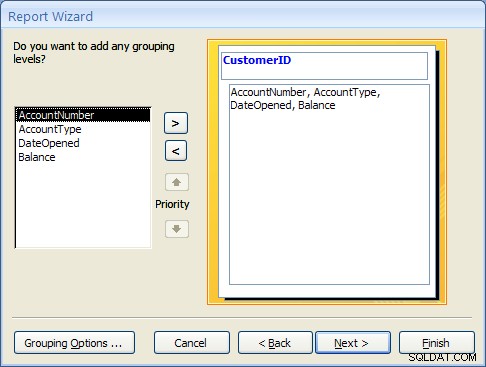
- Group the report by CustomerID by clicking on the CustomerID field and then clicking on the right arrow button. This is shown in the following figure:
Click on the Next button to continue. - Choose to sort the report on the AccountNumber campo. Note that a new button will appear called Summary Options.
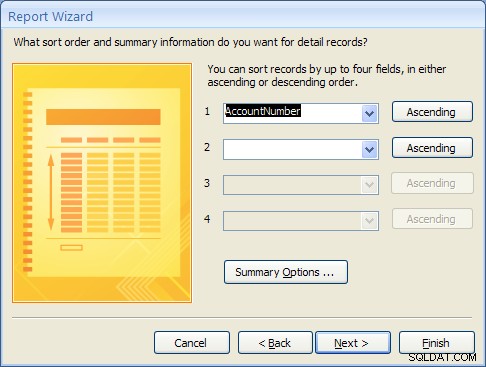
Click on the Summary Options button. Choose the Balance field and select the Sum option. Choose the option to show both Detail and Summary data. Then click on the OK button.

Click on the Next button. - Choose a Block layout and click on the Next button.
- Choose the Corporate style and the click on the Next button.
- Finally, name the report:AccountsReport and click on the Finish button to create, save and run the report.
The output from the AccountsReport is shown below:
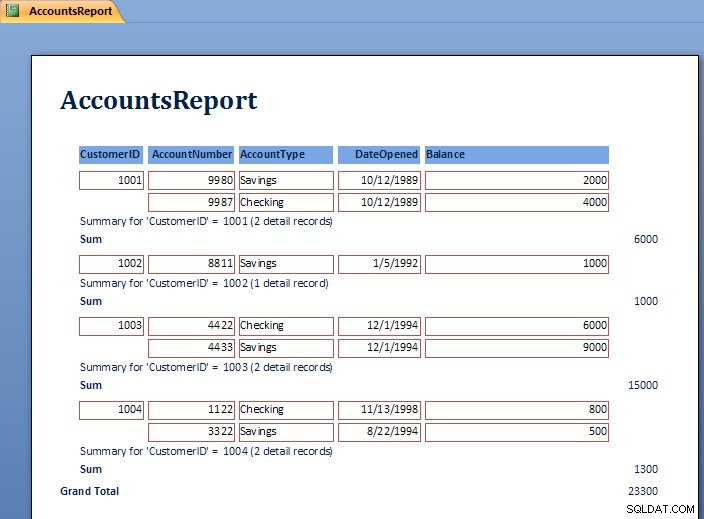
Note the Grouping at the level of the CustomerID and the Sum for each customer’s balances.
To close the report and return to the Access main screen, pull down the File menu and choose Close.
8.3 Review of Creating and Running a Report
As can be seen in the report exercise, there are many ways to create reports to show summation, sorting and layout of the data. Further study of Reports will show how to modify the layout using the Design View. Students are encouraged to work with the Report wizards to create different styles and types of reports.
9 Creating and Running a Master/Detail Form
Master/Detail forms are used to display data from two tables at the same time. MS Access calls the “details” a “subform”. The forms are linked according to the relationship between the tables. Recall that in the example database, the CustomerID is used to link the Customer table (Master) to the Accounts table (Detail). In this section a master / detail form for the Customer and Accounts tables will be created.
- From the Access main screen, click on the Create tab and Click on the “More Forms…” section and finally the “Forms Wizard”.Select the Customer table first and move the CustomerID, FirstName and LastName fields to the Selected Fields list.Next, select the Accounts table and move the AccountNumber, AccountType, DateOpened and Balance fields to the Selected Fields list as shown below.
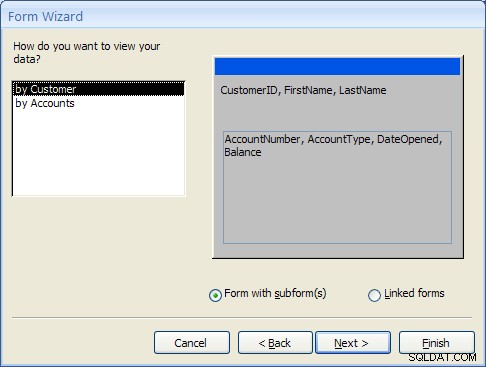
Click the Next… button to move to the next step. - At this point MS Access detects that this form will involve data from two different tables. The first prompt asks how the form should be organized at the top or “Master” level. The “by Customer” selection should be highlighted.The second prompt asks how the forms should be created. For this example, select “Form with Subform(s)” as shown below and click the Next… button to move to the next step.
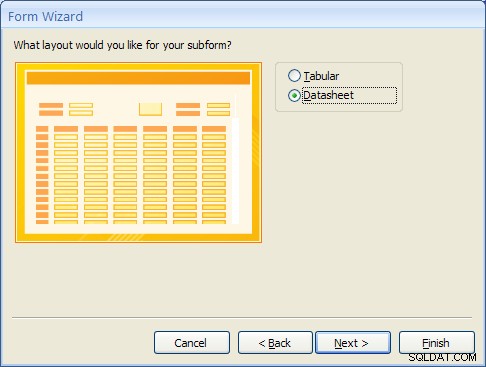
- The Subform is the form that will display the detailed data from the Accounts table. Selecting the “Datasheet” layout will make it easy for the user to view the multiple accounts a Customer may have. Select “Datasheet” and click the Next… button to move to the next step.
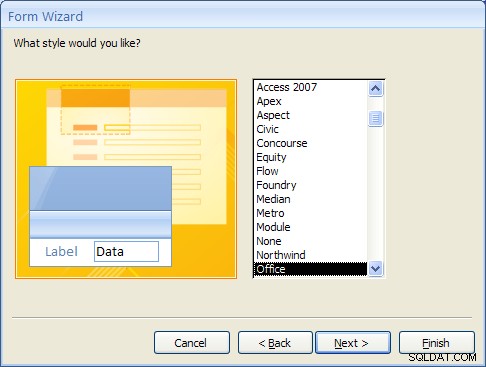
- For Access 2007, select the Office style and click the Next… button to move to the next step. (This step will not appear in MS Access 2010 or 2013).
- Finally, give the main form the name “CustomerMasterForm” and the Subform the name “Accounts Subform”.
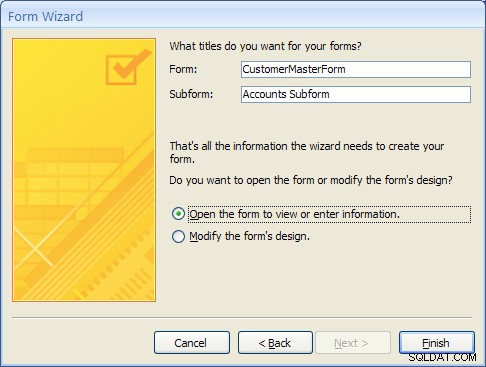
- After clicking on the Finish button the new Master/Detail form will appear as shown below.
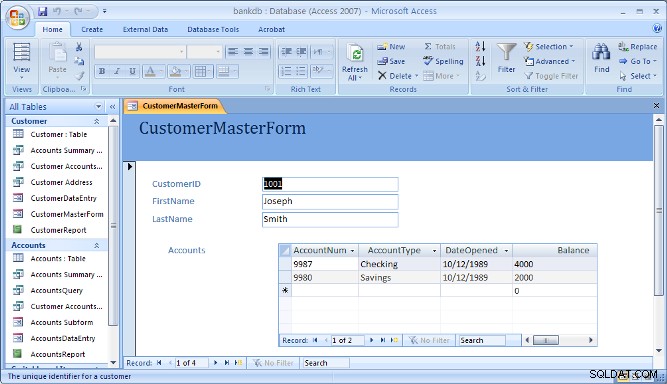
Note that the navigation bar at the bottom of the form is used to navigate through the records in the Master (or top) part of the form.
10 Creating and Running a Switchboard
A Switchboard is a type of form that displays a menu of items that a user can click on to launch data entry forms, reports, queries and other actions in the database. A switchboard is typically created after all of the forms and reports for a database application have been completed. It can be used to guide the user to an appropriate set of forms and reports.
Note that starting with Access 2010, Switchboards are not available by default (you will need to add this to the ribbon bar manually using the Options). Access 2010 and 2013 make use of the Navigation Forms.
In this section, a default switchboard will be created.
- From the Access main screen, click on the Database Tools tab and Click on the Switchboard Manager as shown in the figure below.

If this is the first switchboard made for this database, you will be prompted to create a new one as shown below. Click the Yes button.

- The Switchboard manager will appear as shown below:
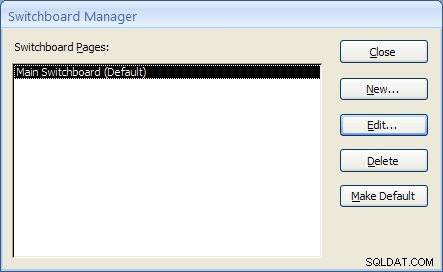
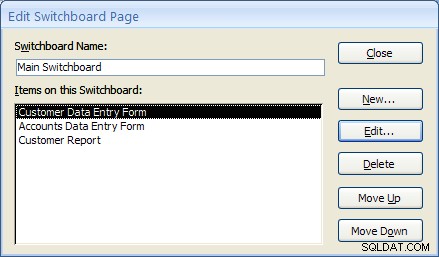
- Click on the Edit menu to edit the “Main Switchboard”. The Edit Switchboard Page will appear as shown below:
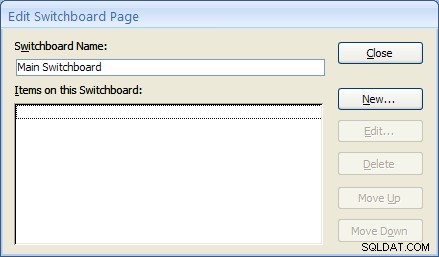
- Add a new switchboard item by clicking on the New… button. The Edit Switchboard Item form will appear as shown below. Fill in the fields as follows:
Text: Customer Data Entry Form Command: Select Open Form in Edit Mode from the drop down list. Form: Select the “CustomerDataEntry” form from the drop down list. 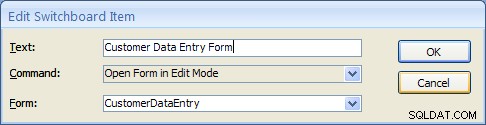
Click on the OK button to save this new Switchboard item.
- Repeat the above step two more times to add Switchboard items for the Accounts DataEntry form and the Customer Report.
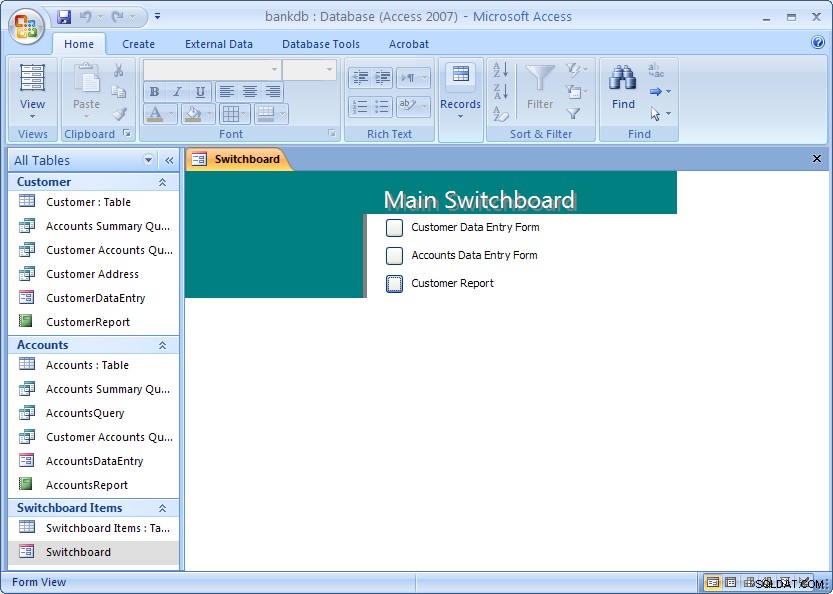
Once completed, click the Close button. Then click the Close button once more to close the Switchboard manager. - From the main MS Access screen look for a new section labeled Switchboard items. To view the switchboard, double-click on name “Switchboard”.
The next section covers creating a Navigation Form which is the recommended navigation screen for MS Access 2007, 2010 and newer versions.
11 Creating and Running a Navigation Form
MS Access 2010 introduced a new form called a Navigation Form. Navigation forms take the place of Switchboards but provide much the same functionality. Namely, they are designed to give the user the ability to run forms and reports without having to hunt through all of the different menus and lists objects. Typically a database application will have one main Navigation form that will appear when the database is opened.
In this section, the basic steps for creating and running a Navigation Form in MS Access 2010 will be demonstrated.
A Navigation Form is another type of form in MS Access 2010 and 2013
- To get started, click on the Create tab on the Access 2010 or 2013 ribbon bar. Under the section for Forms look for the item labeled Navigation Form. Note that this may be located on the button labeled Other Forms.
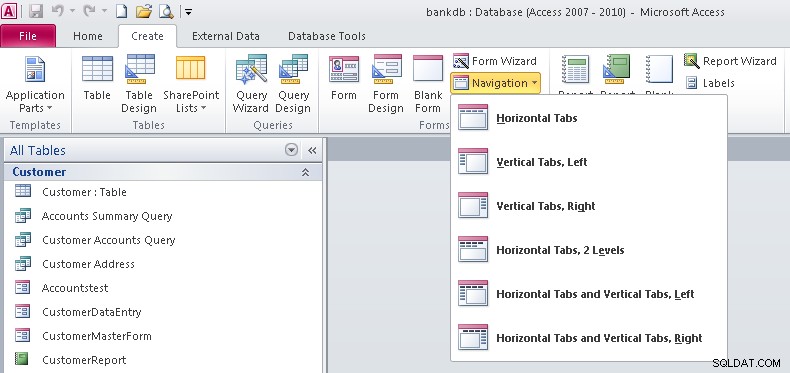
- Note that there are 6 different default styles of Navigation Forms. Each one places the buttons in a different configuration on the screem. Buttons can be aligned across the top, either side or some combination.For this tutorial select the Horizontal Tabs configuration which appears as the first item on the list.
- At this point a new Navigation Form will be created with a row of tabs across the top. The first tab will be labeled [Add New]
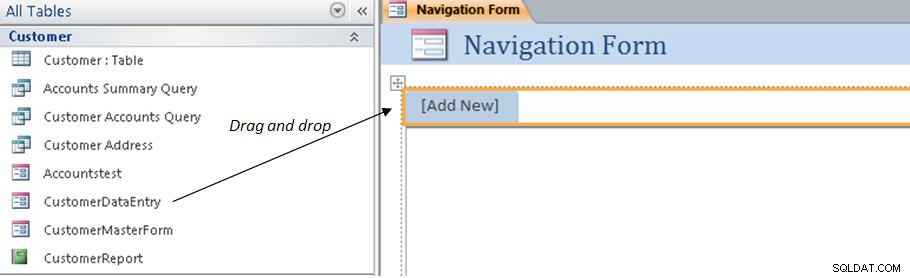
- To add items to the Navigation form, drag the items from the list on the left over to the spot on the Navigation Form labeled [Add New]. This is shown by the arrow in the above figure. For example, drag over the CustomerDataEntry form to the Navigation Form. The result is shown below.
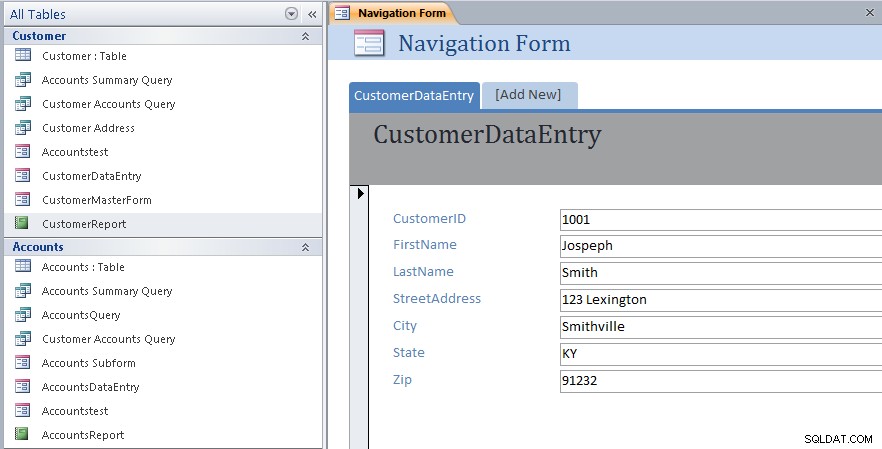
- Next drag and drop the CustomerMasterForm as shown below.

- Next drag and drop the CustomerReport as shown below.
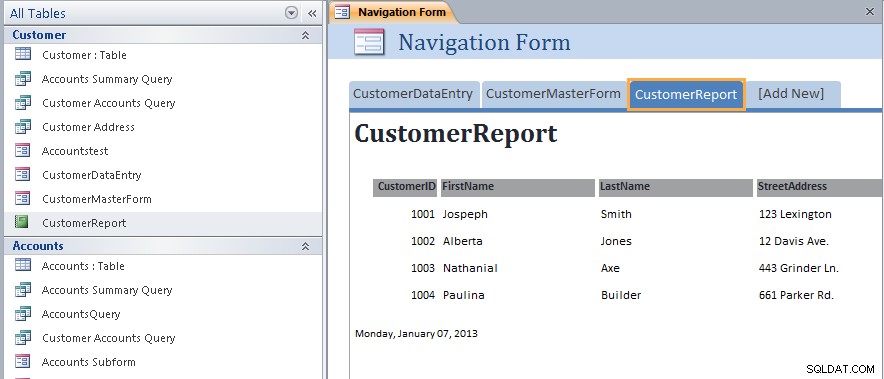
- At this point we have created a new navigation Form and added three items along the top of the page. Save the Navigation Form by right-clicking on the name of the form and choosing Save as shown below:
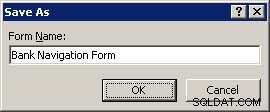
- Name the Navigation Form:Bank Navigation Form and click the OK button.
- Close up the Navigation Form by right-clicking again on the name of the form and choosing Close menu item.At this point the new Navigation Form has been created and saved. The next step will be to view the Navigation Form and navigate the different forms and reports linked to it.
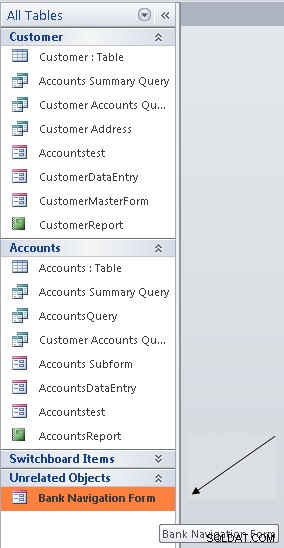
- To view the Navigation Form, look for the Unrelated Objects group on the left side of the screen. Double click on the Bank Navigation Form item as shown below:
The Navigation Form will appear: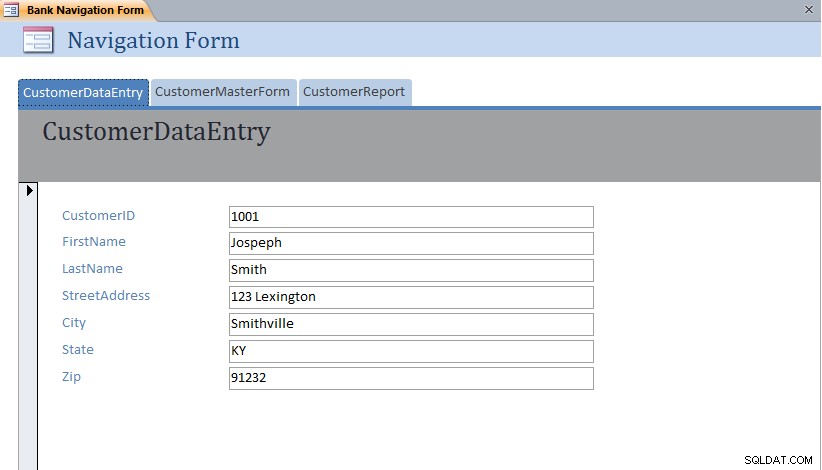 Note that each form or report can be displayed simply by clicking on the different tabs across the top of the Navigation Form.
11.1 Exercise:Modifying a Navigation Form
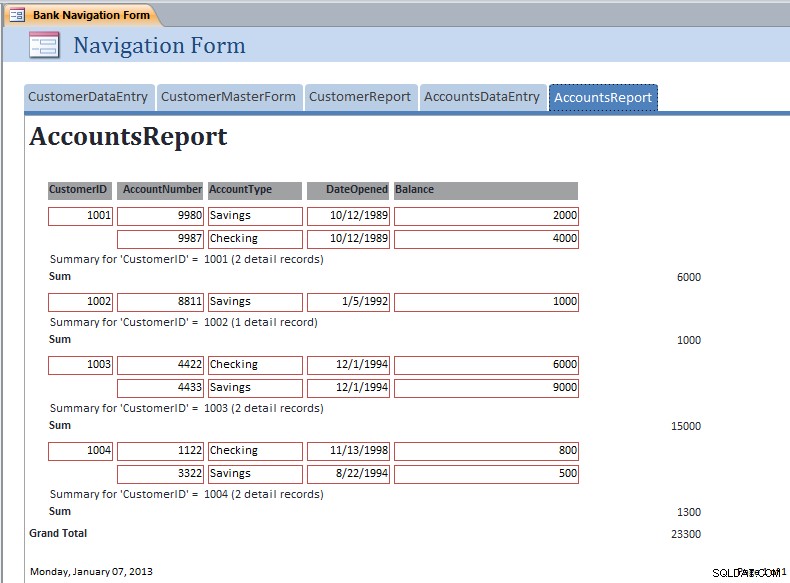
For this exercise, edit the Bank Navigation Form in Layout View and add the following new items to the Navigation Form:
- AccountsDataEntry
- AccountsReport
The resulting Navigation Form should appear as below with the AccountsReport opened:
11.2 Setting the Navigation Form as the Default
MS Access 2007 and 2010 (as well as earlier versions) have the ability to set a default form that will open up automatically once the MS Access data file is opened. This is especially useful for end users so that they always see the same form when they open up the database.
To set the Default Form, pull down the File menu and select the Options menu item.

The Database Options form will appear. Click on the Current Database item on the left hand side.
Under the Application Options heading, look for the Display Form:prompt and set this to the Bank Navigation Form as shown below:
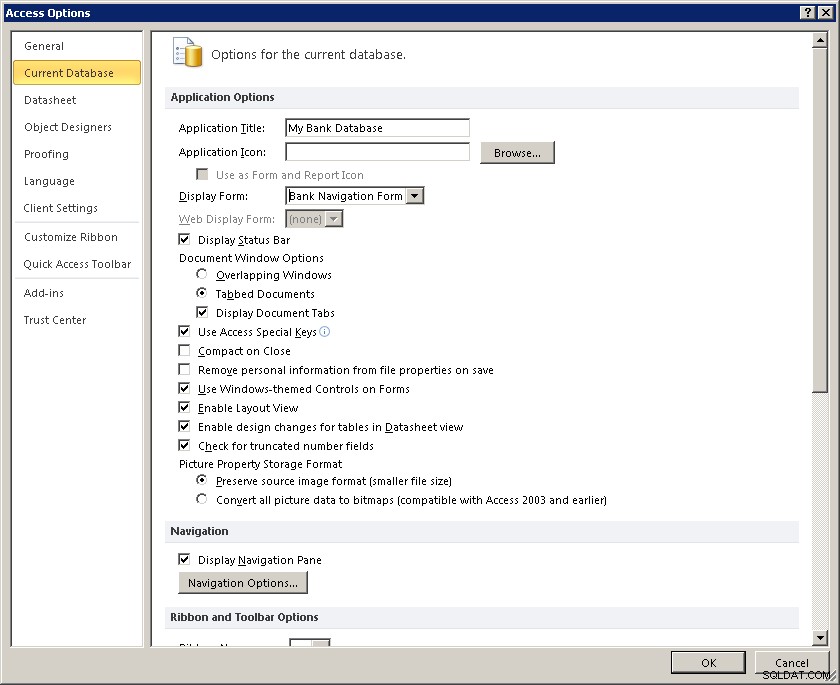
Click on the OK button to close up the Database Options screen.
The next time this database (bankdb.accdb) is opened, the Bank Navigation Form will open up.
12 Tutorial Summary
In this tutorial, we have covered the basics for creating an Access database including tables with data, queries to retrieve data, forms to enter data and reports to display and summarize data.
Students are encouraged to further their Access knowledge and skills by working through more advanced tutorials such as Advanced Access Database Table Design and Advanced Access Forms Design, and by reading the on-line help and Access documentation.
You may also be interested in this tutorial that covers up-sizing the Access database to Microsoft SQL Server using the Microsoft SQL Server Migration Assistant.